4/18/2026
The Step-by-Step Lab-Diamond Engagement Ring Guide
Buying an engagement ring is one of the most significant emotional and financial purchases you will ever make. But it doesn’t have to be stressful. By opting for a lab-grown diamond, you are already making a strategic choice that saves thousands of dollars.
To ensure you execute the rest of the process perfectly, follow this step-by-step guide to building the perfect lab-grown engagement ring.
Step 1: Establish Your Priorities
Before looking at a single diamond, you need to answer two fundamental questions:
- What is the hard budget? Because lab-created diamonds are significantly less expensive than natural ones, your budget stretches much further. Set a comfortable number and stick to it.
- What is the non-negotiable? Does she care purely about size (Carat)? Does she want a highly unique shape (Oval or Emerald)? Or does she want an intricate, custom-designed platinum setting?
Once you know what matters most, it becomes easy to compromise on the factors that matter least.
Step 2: Choose the Shape
The diamond shape sets the tone for the entire ring.
- Round Brilliant: The classic standard. Maximum sparkle, timeless appeal, and the most expensive shape per carat.
- Oval & Pear: Highly popular right now. They look larger per carat than rounds and have an elegant, elongating effect on the finger.
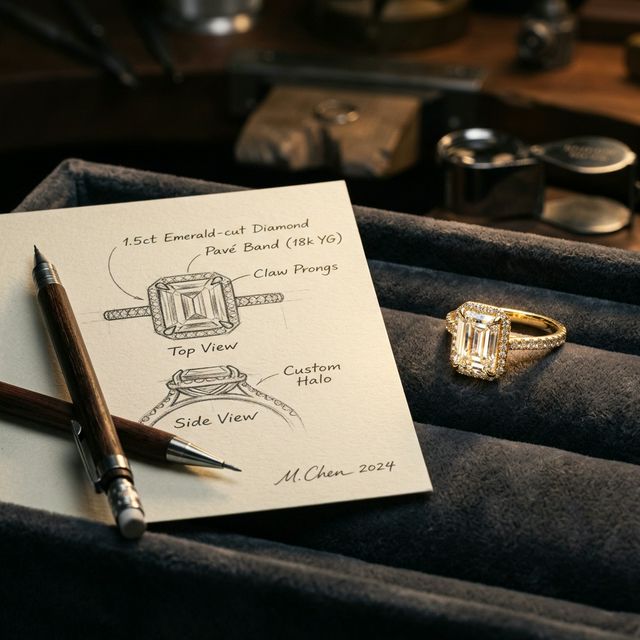
- Emerald & Asscher: “Step-cuts” that offer a hall-of-mirrors flash instead of crushed-ice sparkle. They require higher Clarity grades because it’s easier to see inside the stone.
- Princess & Cushion: Modern, geometric, and very brilliant.
Step 3: Master the 4 Cs for Lab Diamonds
When buying lab-grown, you have greater flexibility to prioritize Cut and Size. Here is our recommended sweet spot for maximum value:
- Cut: Always choose Ideal / Excellent. A mediocre cut completely ruins the brilliance of the stone. Never compromise here.
- Color: Aim for G or H. They look virtually identical to D-E-F (colorless) to the naked eye but cost significantly less.
- Clarity: Aim for VS1 or VS2. As long as the diamond is “Eye-Clean” (you cannot see imperfections without a microscope), paying for VVS1 or Flawless is a waste of money.
- Carat: Buy just shy of the “magic numbers.” Instead of a 2.00ct, look for a 1.90ct–1.95ct. The size difference is imperceptible, but the price drop is real.
Step 4: Pick the Setting and Metal
The setting protects the diamond and defines the aesthetic.
- Solitaire: Beautiful, timeless, focuses all attention on the center stone.
- Pavé / Halo: Adds accent diamonds to increase the footprint of sparkle.
- Three-Stone: Represents past, present, and future.
For metals, Platinum is highly durable and naturally white but is heavier and more expensive. 14k or 18k Gold (Yellow, White, or Rose) are fantastic choices, though White Gold will require occasional rhodium replating to maintain its bright white sheen.
Step 5: Don’t Go At It Alone
The biggest mistake buyers make is assuming they have to navigate the complex diamond market alone, rolling the dice on e-commerce sites.
You have access to professional gemologists and concierges whose sole job is to protect your money. A great concierge will reject stones with hidden lab-grown defects (like strong blue nuance or blurry CVD strain) that certificates won’t mention.
Want to see exactly what you should budget for your dream ring? Use our Diamond Price Calculator, then book a session with our concierge to have the perfect stone sourced directly for you at wholesale rates.